
So, I know I haven’t posted in a while. I got really behind on school work, had a horrible bout of MRSA that required surgery (for those of you who don’t know, MRSA is an antibiotic resistant staff infection, usually starting as a small cut on your skin that becomes infected, and if untreated can cause horrible abscesses on your skin. Think of a REALLY BIG under-the-skin pimple. I mean softball sized. All those utterly disgusting pimple popping videos on youtube aren’t pimples but abscesses. The more you know.), and spent most of my winter break working as much as possible to make rent.
However this is a new semester! So instead of starting posts on organization mid-semester, I am going to start at the beginning. It is easier to stay organized if you start organized. I want to say disregard every post I have written, but its not quite true; you should still use at least a planner and a to-do list maker. One way is the journal I suggested, another is the Google Calendar. One I have picked up on from a friend (who is also a follower!) is called any.do and I absolutely love it. Right now they have two linked apps; any.do and any.do cal. The first one is a task application that allows you to separate your things-to-do into custom categories, i.e. school, groceries, cleaning, etc. What I like is you can have it set an alarm off in the morning so you can plan your day. It will show you all of your tasks, and let you choose whether you would like to do them today, later (you get options for tomorrow, two days, next week, or someday), if they are already done and you forgot to check it off, or if you would like to delete it. If you choose to do it today, it will give you time options for an alarm, or you can opt out. The second app, cal, is well, a calendar. It can sync to your Google calendar and adds in your tasks from any.do. It has beautiful pictures for the background, which you can customize for your style, choosing between art, fashion, food, landscape, animals, design, cars, architecture, and illustration, or any combination. Everyday has a different picture. You can sync facebook birthdays (or not, because I find those notifications quite annoying), easily change which calendars are visible, even change what day you want your week to start (between Saturday, Sunday, and Monday). And the best part about both of these apps is just how pretty they are.

And if you are an Android user, they have beautiful widgets for your home screen that make it easy to add or check off tasks, or add dates into your calendar.
So now, I personally use a combination of my oh-so-loved Original Student Planner, my Google Calendar, and any.do. I still use the journal, but only to record things that couldn’t go into any of these, for instance how I plan to organize my expanding file folder (I don’t know the official name for these...). So anyways…
Here are my tips to starting off right:
Now I know when I started this blog I said I will never say you need to buy things to get organized, however there are some things I am using that you might not have. You don’t need to buy them, but they have made it easier for me. It just means you’ll have to get creative in maneuvering around these items (and you can always send me a quick message asking for advice). Some supplies I am using (pictures below):
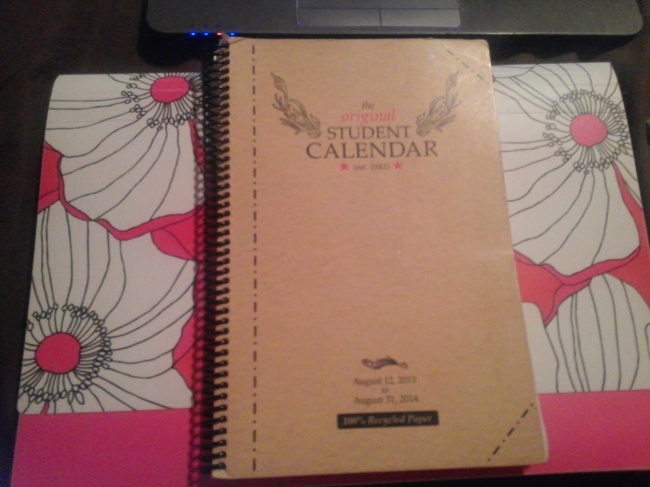
- The Original Student Planner, or planner of choice
- An expanding file folder (I got one at staples with a really cute pattern for around $10)
- Different colored pens, at least as many colors as classes you have (I got a pack of Inkjoy pens from Office Depot for around $6 with doubles of every color)
- Binder clips (right now Michael’s has a Betsey Johnson collection in their impulse section. The binder clips were $2-$3, plus a 40% off coupon, so less than $2)
- A pen pouch (also Michael’s impulse, $1.20 with coupon)
- Different colored markers or highlighters (I am using prismacolor, mostly because I like the ink in them and I want to expand my collection of them, but I don’t recommend it since they are expensive, regularly priced at $5.99 a piece. Just get a pack of highlighters with a bunch of different colors, or even regular markers.)
- Pretty cardstock, or really any scrap piece of paper.
It sounds like a lot, but really its not when its broken down. I use the expanding folder as a binder, and I only need one of them. Everyone needs pens, and this is probably the least important part of the list, however if you elect for single colored pens do not worry about different colored highlighters.
The main thing to remember is this is my way. Nothing says you have to do this identically. I will not call you out for using a binder, or six binders, or paper clips instead of binder clips, or pencil versus pen. I am sharing what I found easiest for me to get organized.
Here are my items:

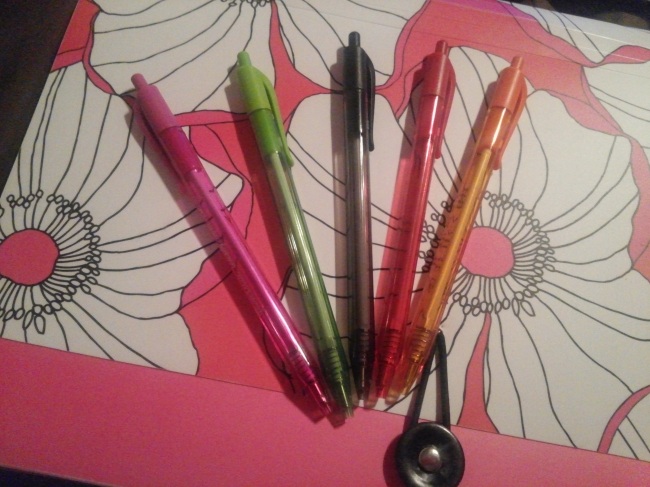


There are more pen color options, I’m just to lazy busy to grab them.
Now lets get down to how I use these items.
The first week of classes is over, at least for me (if not you get to start the same way I did! Slowly over the course of the week until its finally done), and that means you have been to all your classes and received all of your syllabi (or syllabuses, but that sounds silly to me). So pull all those bad boys out and grab your pens and planner. Designate a color to each class. This is why I say have multiple colors. One other option is to just get different colored highlighters and highlighting the different courses, but that seems like more work to me. If you are using The Original Student Planner, open to the time table page and fill in your schedule (If you are not using this planner, and your planner doesn’t have a time table section and course information, scroll down for a little ways until I say stop). I use the specific colors for each block, like so;

See? You can obviously read my schedule; there is no denying that I have Humanities Monday and Wednesday at 8:30-9:45 (wasn’t my choice of time), Statistics Monday, Wednesday, and Friday at 1 pm, and Art History Fridays 10-12:45. The only thing not on here is my online science class, but it has no designated time. However, you could always add a specific time, if you have an online class, to only work on that class. I am just not that good. Next on the agenda (haha, get it? because we are working on our planners!), flip to the course description part of your planner, if it has one. In mine its right after the time tables. It has spots to put your course number, building location and room, teacher’s information, and important assignments. Go ahead and fill it out. I never really used the information last semester, but its better to have it handy than not.

Yes, I know my handwriting is terrible, don’t remind me.
This part is pretty straight forward, and should only take a minute or two. If you are good about it, you can record your grades throughout the semester and never have a bad GPA sneak up on you. Finish up with this quickly and move on to the next part.
Now to the weekly portion. If you are aimlessly scrolling because you didn’t have those two sections, STOP!!!
I skip over the monthly calendars because their boxes are small and therefor bore me. This is where you’ll want your different colored pens or markers or whatever you plan on using to distinguish (if you elected for the monotone planner for expense, or laziness, you will just have to write the course name or some identifying mark next to your assignments). Pull out one syllabus at a time and start transferring it’s calendar into your own. If your syllabi don’t have calendars, something is seriously wrong with your teachers, however a quick remedy is emailing your professors to see if they can give you a schedule.

I took different approaches for each course on inputting the information. For my online course I wrote the learning outcomes for the weeks in the “to do this week” portion of my planner, and then filled in the weekly assignment due dates in. For a class that only gives a general topic for the week, I also write it in “to do this week” and write the assignments as normal. Classes that give a daily break down, assignments as normal and the daily topics in the “general study” portion of each day.
Things that are done get crossed out, things that aren’t get transferred daily.
You want to put in as much as you can now, because in a month you will not feel inclined to input this information. Everyone knows that you are more motivated to get things done at the beginning of the semester than you are at the end. Prepare yourself now for when exams stress you out. I filled in everything on the syllabi plus more, i.e. vacation days and unwritten deadlines.
Try and review everything once a week, and quickly move things over during the week. If every Sunday you went over last week’s assignments and compared to the coming week’s, you can better prepare yourself.
Now let’s move on to the file folder!
Right up there is a picture of my pretty file folder.
Right below is a picture of the inside.

How I separated mine out was Syllabi, then General, then a pocket for each of my classes, then a separate Test pocket (partially because they are more important, partially because I hate leaving empty pockets).
In the General I put important papers from school related things, like parking permit form. Everything is pretty self explanatory. This is where the binder clips come in. The whole reason I switched to this system from binders is because i realized professors hate hole punching, apparently. Which I understand, because I hate hole punching. Now I don’t have to worry about that! I even switched to white legal pads, and I like them better so far, plus they are cheaper. Though now when I do get something hole punched I get frustrated. Anyways, I use the binder clips to separate the sub-sections of each pocket. So in any given pocket, excluding syllabi and general, there will individual clips for notes, homework, quizzes, etc. In tests each subject will be clipped.
The markers should be of coordinating colors, i.e if you art history class is written in red in your planner, have a red marker. I use them to highlight my notes so everything is color coded. It makes it easier on my mind.
The pen bag is just to hold all your pens and markers. Plus I wanted to show everyone that I found a pen bag that matches my glasses.
~~~~~~~~~~~~~~~~~~~~~~~~~~~~~~~~~~~~~~~~~~~~~~~~~~~~~~~~
And this is how I am starting my semester off on a good foot. This was very wordy, but I feel its worthy information.
Next week I am hoping to have an update on keeping to this schedule, and a post on cleaning, or studying!
Just remember, lazy doesn’t always mean unorganized!
